Free ShippingOn orders over £250*

Special OffersView our special offers here.

Same Day DispatchOn orders completed before 12pm

Sales Contact NumberTel: 01255 258525  7:30am to 5:00pm

Category: Uncategorized

  • How to Install Channel Drainage

    How to Install Channel Drainage

    Channel drainage systems are crucial for managing surface water, ensuring areas like driveways, patios and gardens are free from standing water and the potential damage it can cause. 

    If you’re looking to protect your property and maintain its integrity against the challenges of water, this blog will guide you through the process of installing channel drainage. We’ll cover everything from planning and preparation to the actual installation and finishing touches. 

    So, whether you’re a seasoned DIY enthusiast or taking on this task for the first time, our step-by-step guide will help you install channel drainage with confidence. 


    Understanding Channel Drainage

    Channel drainage, also known as trench or linear drainage, is an efficient system designed to capture and convey surface water to a discharge point, such as a main drain or soakaway. 

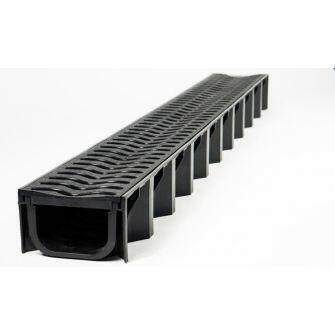
    A channel drainage system consists of a channel, made from materials like plastic or concrete, topped with a grating cover that allows water to enter while filtering out debris. These systems are commonly installed in areas prone to water accumulation, such as driveways, patios, gardens and along the edges of paved areas.


    Types of Channel Drainage

    Channel drainage systems are categorised based on load-bearing capacity, which determines their suitability for different environments:

    Class A15: Ideal for pedestrian areas, gardens, and patios supporting up to 1.5 tonnes.

    Class B125: Suitable for domestic driveways and larger patios handling up to 12.5 tonnes.

    Class C250: Designed for small car parks and roads with light traffic with a capacity of up to 25 tonnes.

    Class D400: Known as highway channel drains, these are intended for main roads and public car parks supporting up to 40 tonnes.

    Class E600 and F900: These high-capacity drains are used in industrial areas, airports, and docks where heavy machinery operates.

    Choosing the right class of channel drainage is crucial to ensure it can withstand the expected load and provide effective water management for the specific application area.


    Common Channel Drainage Applications

    Residential properties: Protects driveways and patios from water damage and pooling.

    Commercial spaces: Ensures safe pedestrian walkways and prevents flooding in parking lots.

    Agricultural and industrial sites: Manages runoff and prevents erosion or waterlogging in operational areas.

    Understanding the different types of channel drainage and their applications is the first step in planning a successful installation.


    Preparation for Channel Drainage Installation

    Proper preparation is key to a successful channel drainage installation. Here are some steps to ensure you’re well-prepared before you begin: 

    1. Site Evaluation

    Identify where water pools and determine the best discharge point, considering the natural flow of water on your property.

    2. System Design

    Measure the area to cover and select the appropriate class of channel drainage for your needs, taking into account the expected load and traffic.

    3. Materials and Tools

    Gather all necessary components, including channel drain units, end caps, outlets, concrete and gravel. Ensure you have tools like a shovel for digging and a saw for cutting channels.

    4. Regulatory Compliance

    Check local regulations for any permissions needed for drainage work to ensure your project complies with building regulations.

    5. Safety First

    Don’t forget personal protective equipment, such as safety glasses and gloves, to prevent injuries during installation.


    Installation Process for Channel Drainage

    Here’s a streamlined guide to get you through the installation process for channel drainage:

    1. Mark the Area

    Outline the trench: Using stakes and string or chalk, mark the area where the trench for the channel drain will be dug. This should include extra space on each side for concrete backfill.

    2. Dig the Trench

    Dig to specification: The trench should be deep enough for the channel drain to sit slightly below surface level, with a base layer of compacted sand or gravel underneath for stability. The depth of a channel drain will depend on the specific installation and the intended use. However, in general, channel drains should be installed at a depth of at least 6 inches to ensure proper drainage and prevent clogging.

    3. Prepare the Base

    Sand or gravel layer: Add a 50mm base layer of sand or gravel. Compact it to create a stable and level foundation for the channel drain.

    4. Assembling the Channel Drain

    Test fit: Assemble your channel drain system beside the trench to ensure a proper fit. Make adjustments or cuts to the system as necessary.

    5. Laying the Channel Drain

    Installation: Start at the lowest point, laying down the channel drain sections and connecting them. Ensure there’s a slight slope for effective water flow towards the discharge point. We recommend a slope of ⅛ inch per foot to ensure proper drainage. 

    6. Connecting to the Outlet

    Outlet setup: Connect the channel drain to the discharge point, ensuring a secure and leak-proof connection. This could be to an existing drainage system or a soakaway.

    7. Backfilling and Concrete

    Securing the drain: Once in place, backfill around the channel drain with concrete to secure it. Ensure the channel drain is properly aligned and level before the concrete sets.

    8. Testing and Finishing Touches

    Water test: Conduct a water test to ensure proper flow through the channel drain to the outlet, making adjustments if necessary.

    Surface finish: Restore the surface around the channel drain, whether it’s paving, gravel, or grass, ensuring it blends seamlessly with the surrounding area.

    By following these steps, you’ll install a channel drainage system capable of effectively managing surface water, protecting your property or project from water damage. 


    Final Thought

    Successfully installing a channel drainage system is a proactive step towards protecting your property from water damage and ensuring proper surface water management. With the right preparation, materials and approach, you can install a system that efficiently manages water runoff for years to come.

    Get everything you need for channel drainage from Build Plumb Plastics!

    If you’re looking to start your channel drainage project with high-quality materials and expert advice, look no further than Build Plumb Plastics. We offer a wide selection of channel drainage products suitable for various applications, from residential driveways to commercial landscapes. Our team is dedicated to providing you with the support you need to find the perfect solution for your drainage needs.

    Visit Build Plumb Plastics today to explore our products and get started on enhancing your property’s drainage system. 
  • How To Perform A Drainage Air Test

    How To Perform A Drainage Air Test

    Ensuring your drainage system is properly sealed and free from leaks is critical for protecting buildings against water damage and structural issues. 

    The drainage air test, a standard procedure in the construction and maintenance of plumbing systems, serves this exact purpose. It’s a straightforward process that verifies the airtightness of your pipework, preventing future complications. 

    In this blog, we’ll explain how to perform a drainage air test. Whether you’re a seasoned professional or just tackling some DIY home improvements, understanding how to carry out a drainage air test correctly is essential for ensuring a safe, leak-free environment. 


    Materials Needed for a Drainage Air Test

    To perform a drainage air test, you’ll need a few essential tools and materials. Make sure you have these tools beforehand to avoid unnecessary interruptions. 

    Here’s what you’ll need:

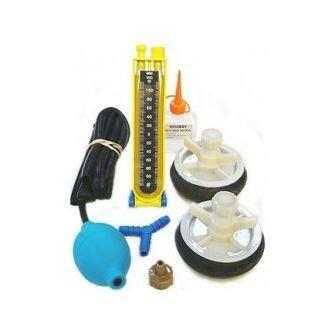
    Air testing gauge: This instrument measures the pressure within the drainage system, allowing you to determine if the system holds air without any leaks.

    Air compressor or hand pump: You’ll use this to introduce air into the drainage system up to the required pressure. The choice between an air compressor or a hand pump depends on the size of the system and personal preference.

    Drainage plugs: These are used to seal off sections of the pipe where the air test is conducted. They ensure the air pumped into the system doesn’t escape, allowing for an accurate reading.

    Pipe caps: For any open ends in the system that aren’t being tested, pipe caps are necessary to close off the system completely.

    Additionally, it’s advisable to have safety equipment, such as gloves and goggles. Working with pressurised systems can be hazardous, and personal protection should always be a priority. 

    BP Plastics provides a full drain testing kit with everything you need. With these tools at your disposal, you’re ready to begin the process of performing a drainage air test.


    Step-by-Step Guide to Performing a Drainage Air Test

    Once you have all the necessary tools and materials ready, performing a drainage air test follows a step-by-step process. This test will ensure your drainage system is sealed correctly and free from leaks. 

    Here’s how to perform a drainage air test:

    1. Prepare the Drainage System

    Close off the system: Begin by inserting drainage plugs at strategic points within the system to isolate the section you wish to test. Use pipe caps to close off any open ends not being tested.

    Check for obstructions: Ensure the section being tested is free of debris or obstructions that could skew the test results.

    2. Connect the Air Testing Gauge

    Attach the gauge: Securely attach the air testing gauge to one of the drainage plugs. This gauge will measure the pressure inside the drainage system and indicate whether there are any leaks.

    3. Pressurise the System

    Use the air compressor or hand pump: Slowly introduce air into the system using your chosen method. Increase the pressure gradually until it reaches the level specified for the test, usually around 4 inches of water (100mm) for domestic systems.

    Monitor for stability: Once the required pressure is achieved, observe the gauge. The pressure should remain stable if the system is airtight.

    4. Monitor the Pressure

    Watch for pressure drops: A drop in pressure indicates a potential leak. Note the speed of the drop — a rapid decrease suggests a significant leak, while a slow decline could point to a minor one.

    Maintain pressure: If the pressure starts to drop, add more air to maintain the test level while you check for leaks.

    5. Identify and Mark Leaks

    Visual inspection: Look for any visible signs of air escaping, such as through joints or connections. You might hear the hiss of escaping air.

    Soap solution: Applying a soap solution to suspect areas can help identify leaks, as bubbles will form where air is escaping.

    Mark any leaks: Use a marker or tape to identify any spots where repairs are needed.

    6. Repair and Retest

    Address leaks: Once leaks are identified, make the necessary repairs to the system.

    Repeat the test: After repairs are completed, perform the air test again to ensure the system is now airtight. Continue this process until the system maintains the test pressure without any drop.


    Safety Tips

    Never over-pressurise: Avoid exceeding the recommended pressure for the test to prevent damage to the drainage system.

    Use protective gear: Always wear safety goggles and gloves to protect against accidental injuries.

    Conducting a drainage air test may seem daunting at first, but by following these steps, you can efficiently assess the integrity of your drainage system.

    Regular testing can prevent bigger issues in the future by preventing unexpected failures and ensuring compliance with building standards. Remember, if you encounter complex issues or if the system consistently fails the test, consulting with a professional plumber or drainage expert is advisable to resolve the problem effectively.


    Troubleshooting Common Problems

    Rapid pressure loss: If pressure drops quickly, this usually indicates a large leak. Double-check all connections and joints, especially those recently worked on or known to be problematic.

    Slow pressure decline: A slow loss might suggest a small leak or even natural temperature-related pressure changes. Re-test focusing on specific sections to isolate the issue.

    No visible leak signs: If leaks aren’t easily identified but pressure drops, consider using a smoke machine. Smoke can help pinpoint smaller, less obvious leaks by escaping through them, providing a visual cue.


    Final Thoughts

    By following the steps in this guide, you should now be able to perform your own drainage air test. 

    Take the Next Step with Build Plumb Plastics

    At Build Plumb Plastics, we supply drainage air test kits so you can perform your own drainage air test, whether it’s for a large-scale project or home DIY. 

    Already got your drainage air test sorted? Visit Build Plumb Plastics for all your plumbing needs. Whether it’s advice or the right materials, we’re here to help you seal the deal on your drainage system’s integrity.

  • Plastic Soil Pipe for Modern Drainage Solutions

    Plastic Soil Pipe for Modern Drainage Solutions

    In the world of modern drainage systems, plastic soil pipe is the go to product for channelling waste water away from residential and commercial property with efficiency and reliability. From their diverse size and types to the array of fittings available, plastic soil pipe epitomises modern drainage solutions. In this comprehensive blog, we look at the details of plastic soil pipe systems, understanding their dimensions, variations, and accompanying fittings for optimal functionality.


    Sizes Available

    Plastic soil pipes are available in a range of sizes, catering to the diverse needs of drainage installations. Common diameters include 82mm, 110mm or 4”, and 160mm or 6”, each tailored to accommodate specific flow rates and waste volumes. The selection of pipe size depends on factors such as the building’s size, the number of fixtures, and the expected wastewater load. Larger diameters are typically employed for main soil stacks, while smaller sizes are used for branch lines and individual fixtures.


    Types of Plastic Soil Pipes

    Plastic soil pipes come in various types, each engineered to meet specific performance criteria and installation requirements. The most prevalent types include:

    uPVC Soil Pipes: Unplasticized Polyvinyl Chloride (uPVC) pipes boast exceptional durability, chemical resistance, and longevity. These rigid pipes are well-suited for both residential and commercial applications, offering a cost-effective solution for drainage systems.

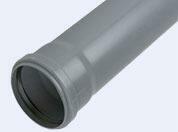
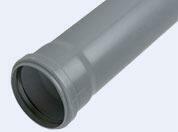
    Push fit soil pipe

    Push-fit Soil Pipes: Push-fit soil pipes feature an innovative push-fit connection, eliminating the need for solvent welding or sealants during installation. These convenient pipes streamline the assembly processes and therefore ensure leak-proof joints, enhancing installation efficiency and reliability.

    BP Pipe

    Solvent Weld Soil Pipes: Solvent weld soil pipes utilise a solvent weld seal to create watertight connections between pipe sections and fittings. This design ensures a secure and reliable joint, resistant to leakage and infiltration, even under fluctuating pressure conditions.

    Plastic Piping


    Fittings for Plastic Soil Pipes

    A comprehensive range of fittings is available to complement plastic soil pipes, enabling seamless integration into drainage systems. Key fittings include:

    Couplers: Couplers are used to join two sections of soil pipe, creating a continuous conduit for wastewater flow. These fittings are available in push-fit or solvent weld variants, providing flexibility and ease of installation.

    Bends: Bends, also known as elbows, facilitate changes in direction within the drainage system. Available in various angles such as 45 degrees and 90 degrees, bends ensure smooth flow transitions while maintaining structural integrity.

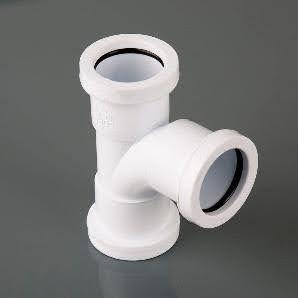
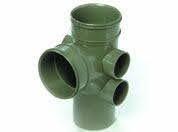
    Branches: Branches enable the connection of lateral lines to the main soil stack, facilitating efficient wastewater disposal from individual fixtures. These fittings come in a range of configurations, including single and double branches, to accommodate diverse installation requirements.

    Access Fittings: Access fittings, such as inspection chambers and access bends, provide convenient points for maintenance and inspection along the drainage network. These fittings ensure accessibility to critical components, simplifying troubleshooting and upkeep tasks.


    Conclusion

    In conclusion, plastic soil pipe systems represent the cornerstone of modern drainage infrastructure, offering versatility, durability, and efficiency. With a range of sizes, types, and fittings available, plastic soil pipes cater to diverse installation requirements while ensuring optimal performance and reliability. As advancements in materials and manufacturing techniques continue to evolve, plastic soil pipes remain at the forefront of sustainable and cost-effective drainage solutions, shaping the landscape of built environments for years to come.

  • Underground Drainage Pipe: Everything You Need to Know

    Underground Drainage Pipe: Everything You Need to Know

    Within construction, efficient drainage systems play a vital role in maintaining the integrity of structures and landscapes. At the heart of these systems lie underground drainage pipes, which form the backbone of any drainage network. In this comprehensive guide, we look at underground drainage pipes, exploring their significance, different sizes, and importantly, their applications.


    Understanding Underground Drainage Pipe

    Underground Drainage Pipes

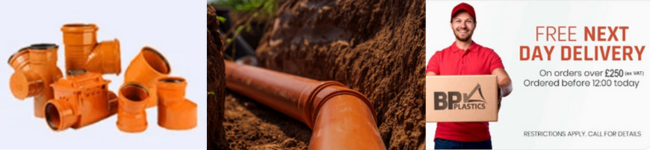
    Underground drainage pipe, is made from durable material such as plastic or UPVC (unplasticised polyvinyl chloride), and is often recognisable by its terracotta colour. These plastic underground drainage pipes are designed to efficiently channel wastewater and surface runoff away from buildings and outdoor spaces. These pipes are engineered to withstand varying environmental conditions, ensuring long-term performance and reliability.

    The Available Range for Drainage Pipe

    At Plastic Drainage, we offer an extensive selection of underground drainage pipes to cater to all diverse project requirements. From standard 110mm or 4” to larger 160mm pipes or 6”, our range covers various sizes from these standard sizes up to 400mm aimed at accommodating different flow rates and project scopes. Whether you’re installing a drainage system for a residential garden or a commercial property, our assortment of drainage pipes ensures a perfect fit for every application.

    Choosing the Right Drainage Pipe

    Selecting the appropriate drainage pipe is paramount to the success of any drainage project. Factors such as pipe diameter, material composition, and installation method must be carefully considered to ensure optimal performance. Our team of experts can provide invaluable guidance in choosing the right drainage pipe for your specific needs, helping you navigate through the many options available.

    Installation and Maintenance

    Correct installation and regular ongoing maintenance is essential to the longevity and effectiveness of underground drainage systems. Correct placement, secure connections, and adequate slope are crucial aspects of installation, ensuring efficient water flow and preventing blockages. Additionally, routine inspections and timely repairs help mitigate potential issues and extend the lifespan of drainage pipes.

    Why Choose Plastic Drainage?

    As leading suppliers of underground drainage supplies, www.PlasticDrainage.co.uk is committed to delivering quality products and exceptional service. With a comprehensive range of drainage pipes, fittings, and accessories, we offer everything you need to complete your drainage project with confidence. Our dedication to customer satisfaction, coupled with competitive pricing and prompt delivery, makes us the preferred choice for drainage solutions across the UK.

    Conclusion

    In summary, underground drainage pipes are an indispensable component of modern drainage systems, providing reliable wastewater management for residential, commercial, and industrial properties. With a vast selection of high-quality drainage pipes and accessories, www.PlasticDrainage.co.uk is your trusted partner for all underground drainage needs. Explore our range of products today and experience the difference that quality and expertise can make to your drainage projects.

    Whether this is for a new construction project or upgrading an existing drainage system, Plastic Drainage has you covered. Contact us today on 01255258525 to learn more about our underground drainage solutions and take the first step towards efficient and sustainable drainage.      

  • Blue Water Pipe for Fresh Water Supply: Your Guide To Blue MDPE Pipe

    Blue Water Pipe for Fresh Water Supply: Your Guide To Blue MDPE Pipe

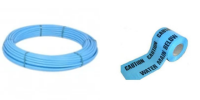
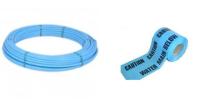
    In the world of water supply systems, the choice of piping plays a pivotal role in ensuring a reliable and safe distribution of fresh water. The go to pipe in the plumbing world is the Blue MDPE (Medium-Density Polyethylene) pipe, also referred to as Alkathene pipe. This blue pipe has become synonymous with water mains and distribution networks across the United Kingdom. In this blog, we will look into the effectiveness of Blue MDPE pipe, exploring why they are the preferred choice for fresh water supply, the range of sizes and diameters available, and the fittings that make them a versatile solution.


    The Blue MDPE Advantage

    Pipe Classification and Rating: Blue MDPE water pipe comes with a full SDR11 rating and is classified as PE80. The explanation for this means that PE80 has been widely used for gas, water and industrial applications for many years and is most commonly named MDPE (Medium Density Polyethylene). However, PE80 could also be HDPE (High Density Polyethylene). PE80 pipes are often rated SDR11 PN12 and have a minimum required strength (MRS) of 8.0MPa (Megapascal). Blue MDPE pipe delivers PE80 and is SDR11 rated in diameters of 20-63mm.

    Durability and Longevity: Blue MDPE pipes are crafted from high-density polyethylene, ensuring they have exceptional durability. This material is known for its resilience against corrosion, abrasion, and other environmental factors, ensuring a long and reliable service life.

    Recognisable Blue Colour: The distinctive blue colour of MDPE pipe is not just for aesthetic appeal. It serves a crucial purpose in differentiating the water supply system, preventing accidental connection to other utilities. This visual cue is a standard in the industry, contributing to the overall safety and efficiency of water distribution networks.

    Lightweight yet Robust: Despite their robust nature, Blue MDPE pipes are surprisingly lightweight. This characteristic simplifies transportation, handling, and installation, making them a preferred choice for both large-scale infrastructure projects and smaller residential applications.

    Flexibility for Varied Terrain: The flexibility of Blue MDPE pipe allows for easy installation across various terrains. Whether navigating through country fields or urban environments, these pipes can be bent and curved without compromising their structural integrity.

    Sizes, Diameters, and Fittings

    The Range of Coil Length: Blue MDPE pipe is available in a wide range of lengths, catering to any diverse application. From smaller lengths suitable for single domestic connections or in longer lengths generally used in municipal water mains, the versatility of Blue MDPE ensures it meets the demands of any project. These blue water pipes are generally available in coils of 6m up to 25m in length.

    Diameters for Every Application: The diameter of Blue MDPE pipe is carefully calibrated to suit specific requirements. Whether you’re looking to connect a single residence or supply water to an entire community, there’s a diameter option to match the scale of your project. These pipes come in a range of sizes from 20mm to 63mm in diameter.

    Comprehensive Fitting Options: The adaptability of Blue MDPE pipe is further enhanced by a comprehensive range of fittings. From connectors and couplers to valves and bends, these fittings facilitate seamless integration with existing systems or the creation of entirely new networks.

    In Conclusion – Embracing the Future of Water Distribution

    In the ever-evolving landscape of water supply, Blue MDPE pipe stands as a testament to innovation and reliability. Its effectiveness in fresh water supply systems, coupled with a diverse range of sizes, diameters, and fittings, makes them an indispensable asset for engineers, contractors, and homeowners alike. As we look to the future, Blue MDPE pipe will continue to pave the way for sustainable and efficient water distribution networks, ensuring communities have access to clean and reliable water sources.

    Investing in Blue MDPE pipe solutions isn’t just a choice; it’s a commitment to a water infrastructure that stands the test of time. 

    Buy Blue MDPE pipe from Plastic Drainage– your trusted supplier! 

  • Underground Drainage Solutions

    Welcome to www.PlasticDrainage.co.uk, your go-to destination for all things underground drainage in the UK building industry! We’re excited to kick off our blogging journey by diving deep into the world of drainage solutions. Whether you’re working on an industrial, commercial, or residential project, we’ve got you covered from guttering to wastewater control and everything in between.

    Why Underground Drainage?

    Before we get into the nitty-gritty details, let’s talk about why underground drainage is so crucial. Think of it as the unsung hero of construction – silently working beneath the surface to keep things flowing smoothly. From managing rainwater runoff to directing wastewater away from your property, a well-designed underground drainage system is essential for protecting your building’s foundation and preventing water-related damage.

    We intend to supply blogs that will help with design and installation of your drainage systems as well as interesting items that will prove helpful to you our customers.

    Expert Advice at Your Fingertips

    Here at Plastic Drainage, we understand that navigating the world of drainage solutions can feel overwhelming. Therefore, we have assembled a team of experts who are here to guide you every step of the way. Do you have questions about which products would be best suited for your project? Need advice on installation techniques? Don’t worry – we’ve got you covered. Simply reach out to our knowledgeable team on 01255 258525, and we’ll provide you with the personalised assistance you need to make an informed decision

    Online Convenience, Bulk Discounts, and Free Shipping

    We believe that shopping for drainage supplies should be as convenient as possible. That’s why all of our high-quality products are available to purchase online, allowing you to browse our extensive catalogue from the comfort of your own home or on-site from your mobile. We offer bulk discounts on selected items, making it easy to stock up on everything you need for your project while importantly, saving money. To top it all off, we provide free shipping and next day delivery on certain orders, so you can enjoy even greater savings and know that we are supporting you every step of the way.

    Join Us on Our Journey

    As we embark on this blogging adventure, we invite you to join us every step of the way. Whether you’re a seasoned construction professional or a DIY enthusiast tackling your first project, there’s something here for everyone. From insider tips and industry insights to product spotlights, we will be covering it all.

    So, bookmark our blog, subscribe to our newsletter, and stay tuned for regular updates packed with valuable information and a touch of good humour. Together, let’s make your underground drainage projects a success!

    Ready to Get Started?

    Ready to take the plunge into the world of underground drainage solutions? Head over to www.plasticdrainage.co.uk to explore our full range of products and start building the foundation for your next project. And remember – if you ever need assistance along the way, our team of experts are just a click or a call away.

    happy draining!

  • UPVC Underground Drainage Pipe

    UPVC Underground Drainage Pipe

    Welcome to www.PlasticDrainage.co.uk, where we supply and deliver all products you may require for underground drainage projects. This blog provides details for the workhorse of all underground drainage systems – terracotta UPVC underground drainage pipe – the unsung hero of construction projects across the UK. 

    As the backbone of any underground drainage system, choosing the right pipe is crucial to ensure long-term performance and reliability. Within this blog we explore the wide range of UPVC pipe options available, along with their sizes, fittings, and certifications, to help you make informed decisions for your next project.

    The Foundation of Reliable Drainage

    At www.PlasticDrainage.co.uk, we take pride in providing a comprehensive selection of high-quality UPVC underground drainage pipe, manufactured right here in the UK. Our pipes are made from durable UPVC material and are designed to withstand the rigors of underground installation. Providing superior durability and longevity for your drainage system.

    Build Plumb Plastics Banner Image

    Sizes to Suit Every Need

    Whether you’re working on a residential, a commercial, or an industrial project, we’ve got you covered with a wide variety of UPVC pipe sizes to suit your specific requirements. From the standard 82mm and 110mm (or 4-inch) pipes commonly used in domestic applications to larger sizes like 160mm, 200mm, 250mm, 315mm, and 400mm outside diameter pipes for more extensive projects. We offer a size for every need you may have.

    Certified Quality and Compliance

    When it comes to underground drainage, quality and compliance are non-negotiable. That’s why our UPVC underground drainage pipe is rigorously tested and certified to meet all relevant industry standards and regulations. Our pipes comply with certification such as BS EN 1401 and BS EN 13476, ensuring that they meet the highest standards of quality, performance, and durability.

    Adaptors and Lubricants for Seamless Installation

    In addition to our extensive range of UPVC underground drainage pipe, we also offer a variety of fittings, adaptors, and lubricants to streamline the installation process. Our adaptors are designed to seamlessly connect new pipe to existing drainage systems, providing a watertight seal and ensuring compatibility between different pipe materials and sizes. And with our drainage lubricants, installation becomes simple, reducing friction and easing the insertion of pipes and fittings.

    Conclusion

    From domestic drainage projects to large-scale commercial installations, UPVC underground drainage pipe is the cornerstone of reliable and efficient drainage systems. At www.PlasticDrainage.co.uk , we’re committed to providing you with the highest quality pipe products, along with expert advice and support to help you tackle any project with confidence.

    Ready to get started? Explore our full range of UPVC underground drainage pipe and fittings at https://plasticdrainage.co.uk/underground-drainage , and discover why we’re the trusted choice for drainage solutions across the UK.

    Happy draining!

  • How Many Soakaway Crates Do I Need?

    How Many Soakaway Crates Do I Need?

    Managing rainwater effectively is crucial, especially in areas prone to heavy rainfall or flooding. Soakaway crates are key to this, offering a practical solution for controlling surface water. 

    This blog will guide you through everything, from what soakaway crates are to how many you’ll need for your project. By following this guide, you can ensure your land stays dry and water is managed sustainably. 

    So, whether you’re planning a large-scale commercial project or looking to improve your home’s drainage, keep reading to find out how to calculate the right number of soakaway crates for your needs. 


    Understanding soakaway crates

    Soakaway crates are an essential part of modern drainage systems. They are designed to manage excess rainwater in both urban and rural settings.

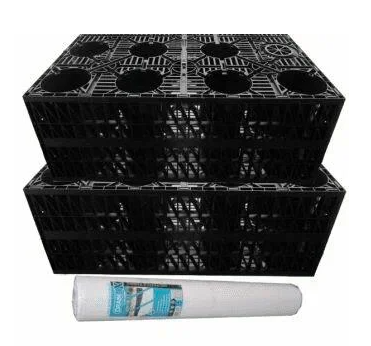
    Soakaway crates work by capturing rainwater and allowing it to slowly infiltrate back into the soil, reducing the risk of flooding and waterlogging. Made from sturdy, lightweight materials, soakaway crates can be easily installed underground and are an environmentally friendly alternative to traditional drainage methods.

    There are two main types of soakaway crates: those used for filtration and those for attenuation. 

    Filtration crates are wrapped in a permeable geotextile, allowing water to seep into the surrounding ground gradually. 

    Attenuation crates are used to temporarily store water before it’s slowly released into the drainage system or a local watercourse. 

    Choosing the right type of soakaway crate depends on your specific project needs, including the soil type, the amount of space available and local planning regulations. 

    With a range of sizes and capacities available, soakaway crates offer a flexible solution for managing rainwater, slit capture, and various applications from residential gardens to large commercial developments.


    How Many Soakaway Crates Do I Need? 

    Determining the right amount of soakaway crates for your project depends on several factors. Here are some things to consider:

    1. Assess the Impermeable Area

    What to Measure: Calculate the total area (in square metres) of impermeable surfaces that contribute to runoff. This includes roofs, driveways, patios and any other surfaces that don’t absorb water.

    Why It Matters: The larger the impermeable area, the more water there is to manage, affecting the number of soakaway crates required.

    2. Soil Type and Percolation Test

    Conduct a Percolation Test: This test determines how quickly water can soak into the soil. Different soils absorb water at different rates, influencing the system’s design.

    Interpreting Results: Clay-heavy soils absorb water slowly, requiring more or larger crates, while sandy soils might need fewer crates due to faster absorption rates.

    3. Local Regulations and Space Availability

    Check Regulations: Some areas have specific requirements for stormwater management systems, including minimum distances from buildings and property boundaries. Typically, there is a requirement where possible for this location to be at least 5 metres from both lived in buildings and the boundary of the property. As a general exception it usually has to be a minimum of 3 metres where the above is not possible.

    Consider Space: The physical space available for your soakaway system may also limit the number or size of crates you can use.

    4. Calculation Example

    A simple starting formula for calculating the number of soakaway crates you might need is:

    Number of Crates = (Impermeable Area x Rainfall Intensity x Runoff Coefficient) / Crate Capacity

    Expert Advice: For precise calculations and to account for local conditions, consulting with a drainage expert or engineer is recommended.

    5. Planning for Excess

    Safety Margin: Always plan for a slightly higher capacity than minimum calculations suggest to accommodate heavy rainfall events and potential miscalculations.


    Additional considerations

    When calculating the number of soakaway crates you need, there are broader considerations to ensure your soakaway system is as efficient and effective as possible.

    1. Understanding Local Climate Patterns

    Rainfall Intensity: The volume of rain your area receives can significantly impact the performance of your soakaway system. Areas with higher rainfall intensity might require a more robust system to handle the increased water volume.

    2. Future-Proofing Your System

    Anticipate Changes: Consider future developments or changes in land use that might affect runoff patterns. Planning for potential increases in impermeable surfaces can save you from costly upgrades down the line.

    3. Environmental Considerations

    Sustainable Drainage Systems (SuDS): Integrating your soakaway crates into broader SuDS can enhance environmental benefits, like improving water quality and supporting biodiversity.

    4. Regular Maintenance Checks

    Inspections: Periodic inspections and maintenance are vital to prevent blockages and ensure your soakaway system remains effective. This includes checking for sediment build-up and ensuring the inlet and outlet pipes are clear.

    5. Expert Consultation

    Tailored Solutions: Every site has unique characteristics. Engaging with drainage experts can provide customised advice, ensuring your soakaway system is optimised for your specific conditions and needs.

    By taking these additional factors into account, you can ensure that your soakaway system not only meets current needs but is also prepared for future challenges, contributing to a more sustainable and resilient drainage solution.


    Summary 

    Determining the number of soakaway crates required for your project requires an understanding of your site’s specific conditions, including the impermeable area, soil type, local climate patterns, and regulatory requirements. By taking these factors into account, you can ensure that your soakaway system is not only compliant with local regulations but also efficient and effective at managing stormwater runoff.

    Remember, while this guide provides a solid foundation for planning your soakaway system, consulting with drainage professionals is invaluable. They can offer tailored advice, help navigate local regulations and ensure your system is designed to handle your specific needs.

    Soakaway Crates from Build Plumb Plastics

    At Build Plumb Plastics, we understand the importance of finding the perfect soakaway solution tailored to your specific needs. Our range of soakaway crates is designed to cater to various project sizes and requirements, ensuring you have access to high-quality, sustainable drainage solutions.

    Ready to Get Started?

    Visit our website for more details. Our team is always on hand to provide expert advice and support, guiding you towards the best choices for your specific situation.

  • How To Install A Soakaway Crate

    How To Install A Soakaway Crate

    Installing soakaway crates is a practical solution for managing excess water effectively, especially in areas prone to heavy rainfall. 

    This blog post will guide you through the process of installing soakaway crates, ensuring you can efficiently mitigate flooding risks. Whether you’re tackling a home improvement project or working on a larger commercial development, understanding the installation process is key to success. 

    Keep reading to learn how to properly install soakaway crates.


    Planning and Preparation

    Before diving into the physical installation of soakaway crates, it’s essential to ensure you’re fully prepared for the task ahead. The following steps will help you plan your project effectively and prepare the site for installation.

    Site Assessment

    Evaluate the Area: Determine the size and location for your soakaway system based on the runoff area it needs to serve. Consider soil type, as this will affect the system’s design and efficiency.

    Conduct a Percolation Test: This test will help you understand how quickly water can be absorbed by the soil, which is crucial for sizing your soakaway system correctly.

    Design and Materials

    Calculate the Number of Crates Needed: Use a formula or consult with a professional to determine how many soakaway crates your project requires.

    Select the Right Type of Crates: Choose between attenuation and infiltration crates based on your site’s specific needs and the intended purpose of your soakaway system.

    Gather Necessary Materials: In addition to the soakaway crates, you will need geotextile fabric to wrap the crates, gravel for the base and cover, and any required pipes for connecting to downspouts or drainage systems.

    Legal and Regulatory Checks

    Planning Permissions: Check with your local council or regulatory body to see if you need permission to install your soakaway system, especially if it’s near building foundations or property boundaries.

    Building Regulations: Ensure your planned installation complies with any relevant building regulations.

    Preparation of the Site

    Mark the Area: Clearly define the area where the soakaway crates will be installed. Consider access for machinery if the site is large or difficult to dig by hand.

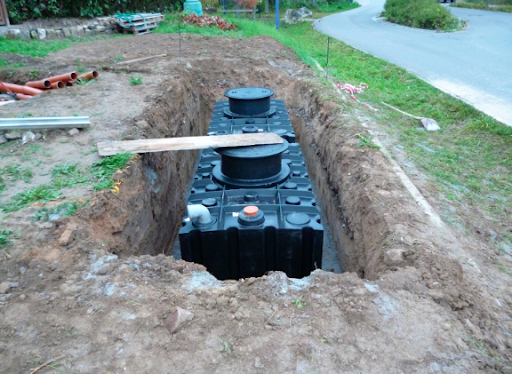
    Excavate the Site: Dig a hole to the specified depth and width required for your soakaway system, allowing extra space for the geotextile wrap and gravel layers.

    By carefully planning and preparing your site, you set a solid foundation for the successful installation of soakaway crates. 

    The next section will guide you through the installation process step by step.


    Installation Process

    After you’ve planned your project and prepared the site, it’s time to move on to the actual installation of the soakaway crates. This part of the process is critical for ensuring that your soakaway system functions effectively and lasts for years to come. 

    Here’s a step-by-step guide to installing your soakaway crates:

    Laying the Foundation

    Base Layer: Begin by laying a 150mm layer of 20-40mm clean crushed stone at the bottom of the excavation. This layer aids in drainage and provides a stable foundation for the crates.

    Geotextile Fabric: Cover the stone layer with a permeable geotextile fabric. This fabric prevents soil from clogging the stones and crates, while still allowing water to pass through.

    Installing the Crates

    Positioning the Crates: Place the soakaway crates on top of the geotextile fabric. Ensure they are correctly positioned according to your design, either for attenuation or infiltration.

    Stacking: If your design requires multiple layers of crates, stack them as planned. Make sure the crates are securely interlocked to prevent shifting.

    Wrapping: Once all crates are in place, wrap the sides and top with the geotextile fabric and tape the seams using waterproof tape. This encapsulation further prevents soil ingress and ensures the longevity of the system.

    Connecting to Drainage

    Piping: If your soakaway system is connected to downspouts or other drainage, install the piping according to your design. Ensure a secure and watertight connection between the pipes and crates.

    Inspection Point: Consider installing an inspection point within the system. This allows for easier maintenance and troubleshooting if required.

    Finishing Up

    Covering: Cover the wrapped crates with another layer of crushed stone. This layer should be about 150mm thick, providing protection and aiding in water distribution.

    Final Layer: The topmost layer should consist of the soil that was excavated. Replace the soil, ensuring the system is completely buried and the ground surface is level.

    Landscaping: Once the system is buried, you can landscape the area as desired. Whether it’s reseeding grass or installing hardscaping, ensure the surface allows for effective water runoff into the soakaway system.


    Testing

    Before considering the project complete, it’s wise to test the system with water to ensure it’s functioning as expected. This can highlight any immediate issues with the installation that can be rectified before they become larger problems.

    By following these steps, your soakaway crate installation should be successful, providing efficient rainwater management for your property or project. 

    Remember, while DIY installation is possible for smaller projects, larger or more complex systems may benefit from professional installation to ensure compliance with local regulations and optimal functionality.


    Maintenance and Troubleshooting

    After installing your soakaway crates, ongoing maintenance is essential to ensure they continue to operate efficiently. Regular checks and simple troubleshooting can prevent common issues and extend the lifespan of your system.

    Regular Maintenance Checks

    Inspect Regularly: Schedule inspections at least twice a year, ideally in late autumn and early spring, to check for any signs of blockage or damage. 

    Clear Debris: Remove leaves, silt, and other debris from the area around the inlet and inspection points to prevent blockages.

    Geotextile Fabric: Check the geotextile fabric for any tears or damage that could compromise the system’s efficiency. Replace if necessary.

    Troubleshooting Common Issues

    Waterlogging: If you notice water pooling on the surface above the soakaway, it may indicate a blockage or that the system is overwhelmed. Check for debris blocking the entrance to the crates or consider adding additional crates to increase capacity.

    Collapsed Areas: Should the ground above the soakaway system begin to sink, it could suggest a crate collapse. This is often due to heavy machinery or vehicles passing over an area not designed to support such weight. Excavate the area carefully to inspect and replace any damaged crates.

    Poor Drainage: If the system seems to be draining poorly, perform a percolation test near the soakaway site to reassess the soil’s absorption rate. Soil conditions can change over time, affecting the efficiency of your soakaway system.


    Enhancements

    To improve the performance of your soakaway system, consider these enhancements:

    Adding More Crates: If your initial system was designed with a minimal safety margin, adding more crates can increase its capacity to handle larger volumes of water.

    Improving Inlet and Outlet: Ensuring that the pipes leading into and out of the soakaway crates are clear of obstructions and functioning correctly can improve overall efficiency. 

    Landscaping Adjustments: Altering the landscape to direct water more efficiently into the soakaway area can also enhance the system’s effectiveness.

    Professional Assistance

    While regular maintenance and basic troubleshooting can be handled by most property owners, don’t hesitate to seek professional help for more complex issues or if you’re unsure about the condition of your soakaway system. A drainage expert can provide valuable insights, conduct thorough inspections, and recommend the best course of action to ensure your soakaway system remains in optimal working order.

    If you do need some help, don’t hesitate to get in touch with Build Plumb Plastics and a member of our friendly team will be happy to help. 


    Ensuring Long-Term Success with Soakaway Crates

    By following the steps outlined for planning, preparation, installation, and maintenance, you can create a robust soakaway system that not only protects your property from water damage but also contributes to environmental sustainability.

    Remember, the key to a successful soakaway crate system lies not just in accurate installation but also in ongoing care and troubleshooting. Regular maintenance ensures that your system remains effective over time, safeguarding against common issues like waterlogging and blockages.

    For those looking to install or maintain soakaway crates, Build Plumb Plastics is your go-to resource. We offer a wide range of soakaway crates suitable for various applications, from residential gardens to large commercial developments. Our team of experts is on hand to provide advice and support, ensuring you find the perfect solution for your rainwater management needs.

    Get in touch today to learn more about how our soakaway crates can benefit your project and to get personalised advice tailored to your specific needs.